Installing Duradek Waterproof Vinyl Decking: A Step-by-Step Guide
Applying Duradek to the decks and stair landings in these images involved a systematic process to ensure a durable, waterproof, and aesthetically pleasing finish. Below is a step-by-step breakdown of the installation process.
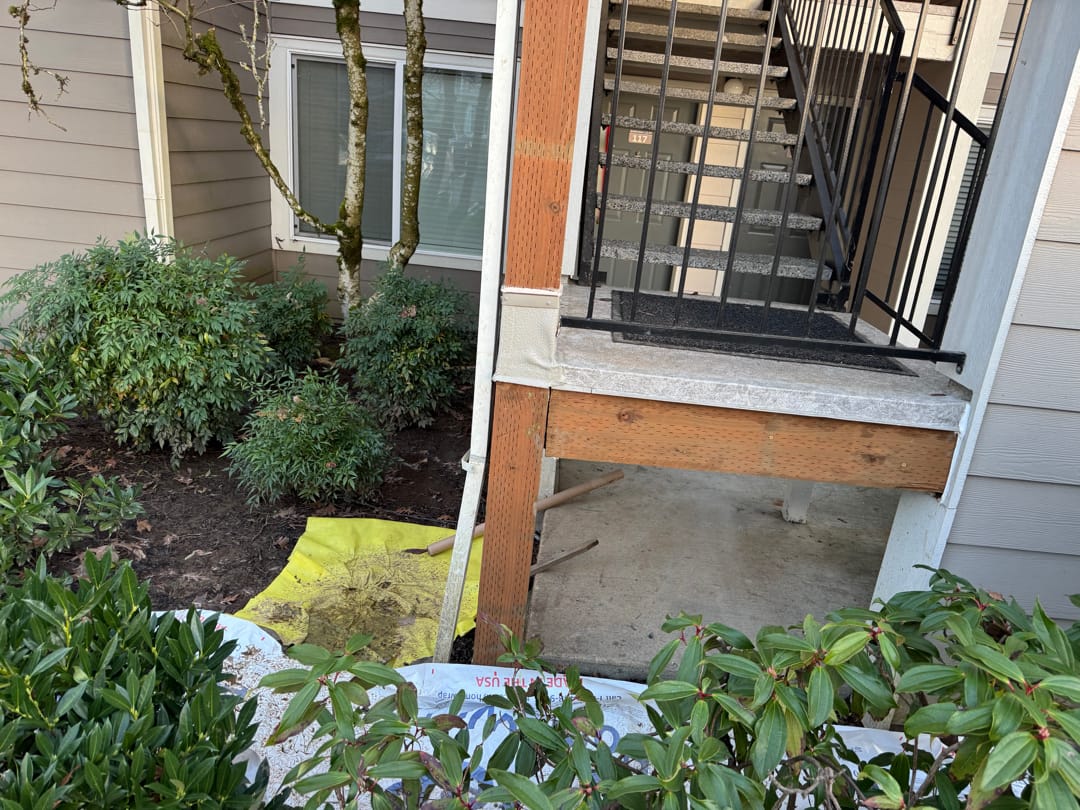
Step 1: Preparation and Assessment
Before beginning the installation, we assessed the existing structure. The deck framing and substrate were inspected for any damage, rot, or structural weaknesses. Any necessary repairs were completed to provide a solid foundation for the Duradek installation.
Step 2: Surface Preparation
The existing deck surface was thoroughly cleaned and cleared of debris.
Any old coatings or coverings were removed to expose the plywood or concrete substrate.
The deck surface was checked for smoothness, and any irregularities were sanded down.
For wooden substrates, we ensured all joints and seams were properly secured and fastened.
For concrete surfaces, we checked for cracks and filled them as needed.
Step 3: Installing the Plywood Underlayment (if needed)
If the existing substrate was not suitable, a new 5/8″ or 3/4″ exterior-grade plywood was installed.
All plywood seams were properly spaced and fastened using screws and adhesives to prevent movement.
The surface was then sanded to create an even plane.
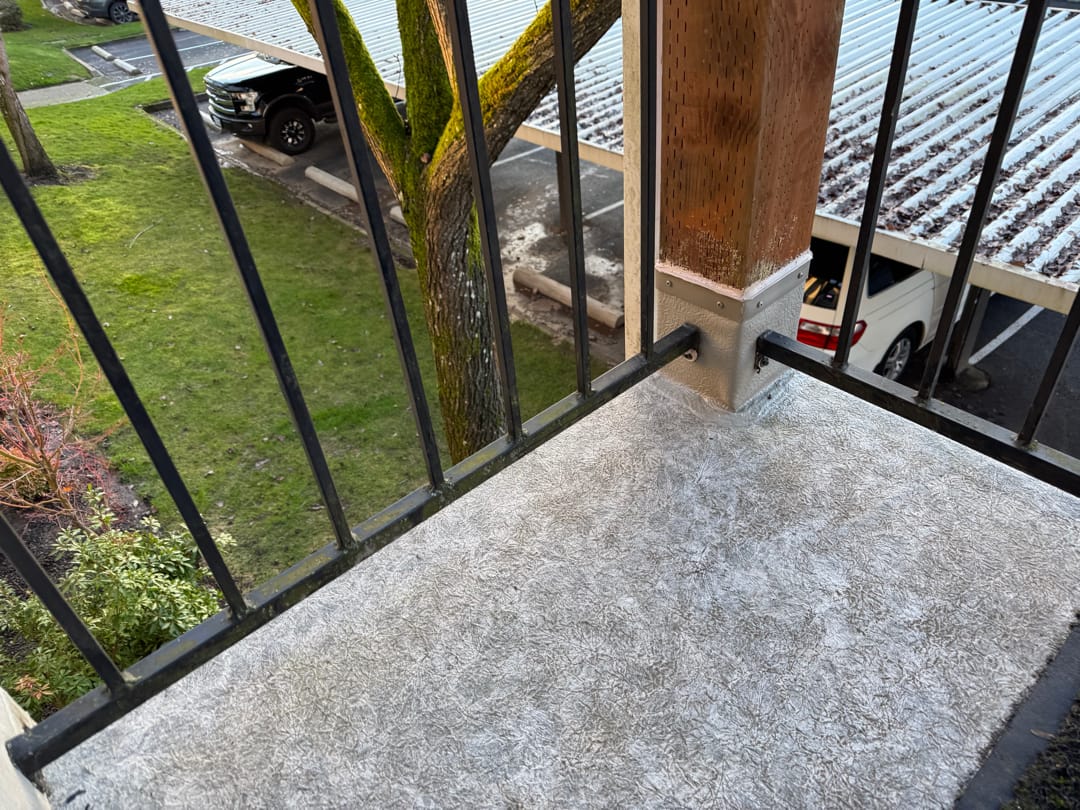
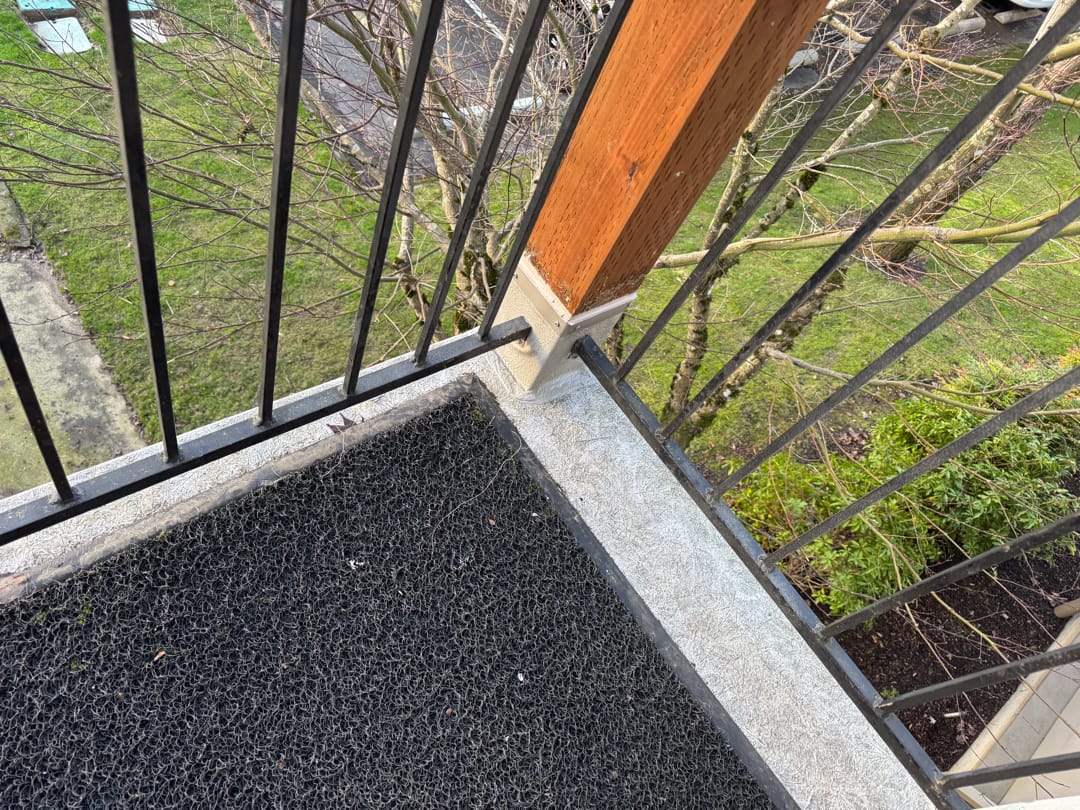
Step 4: Edge Flashing Installation
Aluminum or galvanized metal edge flashings were installed around the perimeter of the deck and stair landings.
These flashings were fastened securely and overlapped to create a seamless transition for waterproofing.
Flashing was sealed with a polyurethane caulking to prevent water infiltration.
Step 5: Applying Adhesive for Duradek
We used a specialized adhesive designed for Duradek application.
The adhesive was evenly applied in sections to ensure full bonding between the vinyl sheet and the substrate.
We paid special attention to edges and seams to prevent lifting or bubbling over time.
Step 6: Laying the Duradek Vinyl Membrane
The Duradek vinyl sheet was carefully unrolled and positioned over the adhesive-coated surface.
Each sheet was aligned properly to ensure minimal seams and a uniform appearance.
Using a roller, we applied pressure across the vinyl to eliminate air pockets and ensure proper adhesion.
Excess material was trimmed around the edges to fit precisely within the deck and landing area.
Step 7: Heat-Welding Seams
To ensure a fully waterproof finish, all seams were heat-welded using specialized tools.
This process bonded the vinyl sheets together, preventing moisture infiltration.
Seam edges were then checked and sealed with additional adhesives as necessary.
Step 8: Securing Railing Posts
The railing posts were carefully reinstalled through pre-planned penetration points.
Each penetration was sealed with a waterproof membrane and caulking to prevent leaks.
Additional Duradek vinyl patches were applied around posts for extra protection.
Step 9: Finishing Touches
We cleaned off any excess adhesive and inspected the entire installation for imperfections.
A final waterproofing sealant was applied around edges and seams to enhance durability.
The deck was left to cure for the recommended period before allowing foot traffic.
Step 10: Final Inspection and Clean-up
A thorough inspection was conducted to confirm the integrity of the waterproofing system.
All tools, excess materials, and debris were removed from the worksite.
The deck was wiped down and prepared for use.
Conclusion
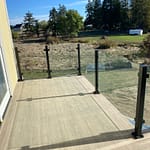
The completed Duradek installation transformed the stair landings and balconies into waterproof, slip-resistant, and visually appealing surfaces. This system will ensure long-term protection from moisture damage while enhancing the safety and aesthetics of the building.