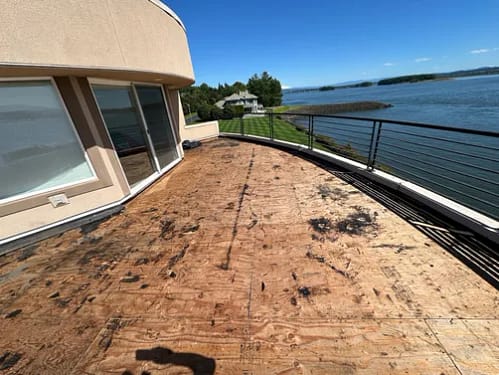
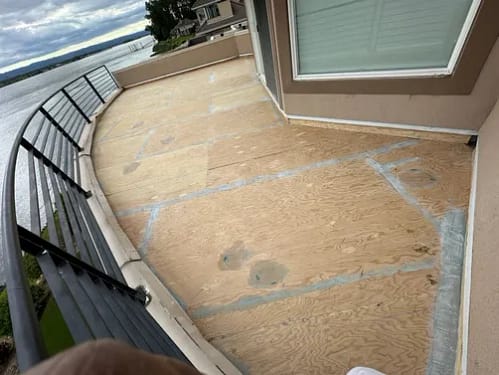
The homeowners had an old asphalt surface on their deck that had seen better days. The wear and tear from the elements were undeniable, and it had reached a point where the deck was no longer functional, let alone visually appealing. Yet, after our inspection, we realized that despite the asphalt’s deterioration, the underlying structure was still in stable condition. This meant we could go ahead with resurfacing the deck, transforming it from the tired old asphalt to a brand-new Duradek surface. We began the process with a thorough inspection of the deck. Everything seemed good to go. Next came the task of removing the old asphalt. It was a messy job, as the surface had cracked and worn down over time, but we knew that getting rid of every last piece of the asphalt was essential for a smooth transition to the new surface. We used scrapers, chisels, and a bit of muscle to pry off the old asphalt, leaving the subfloor clean and ready for the next stage.
With the asphalt gone, we could finally inspect the subfloor. The key to a good Duradek installation is a smooth, even base, so any uneven spots were leveled out, and any damage to the subfloor was repaired. The Duradek material itself arrived in large vinyl sheets, and we carefully measured and cut each sheet to fit the dimensions of the deck. Precision was key here; any mistakes in cutting could compromise the waterproofing and leave weak points. Once the sheets were prepared, we applied a special adhesive across the entire surface, ensuring that the vinyl would bond securely. Now came the part we always found exciting—laying the Duradek.
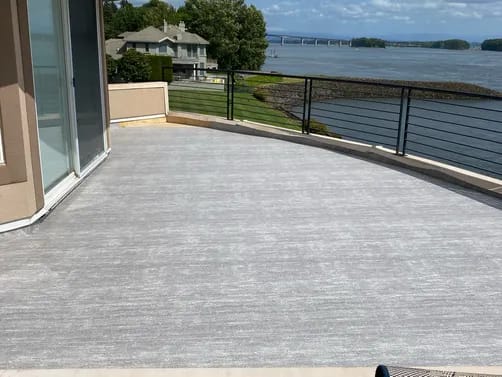
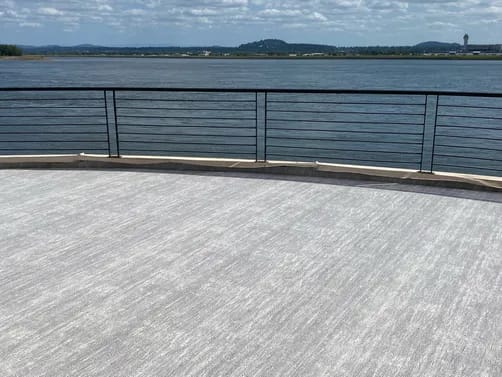
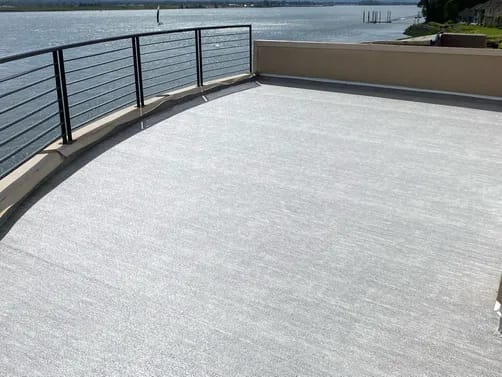
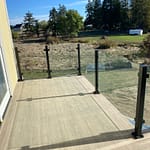
Each sheet was carefully positioned on the adhesive, and we made sure to smooth out any air bubbles or wrinkles as we went along. It was satisfying to see the deck take on a fresh, clean look. We took our time sealing the seams, heat-welding them to ensure a completely waterproof finish. Every edge was trimmed neatly, and the seams were sealed to perfection. By the end of the day, the deck already looked completely transformed. Once the main surface was done, we moved on to the finer details—ensuring the edges of the Duradek were properly sealed, especially around the perimeter and any drainage areas. This was a crucial step to ensure longevity. Finally, with the Duradek fully in place, we performed a final inspection. We looked for any imperfections where the adhesive hadn’t taken hold. As a final test, we sprayed some water on the surface to check how it drained. As expected, the water flowed off perfectly, with no signs of pooling or leaks.
Whether you are looking to build a brand new waterproof deck or revitalize an existing one, Waterproof Decks Of Oregon is here to make your dreams a reality. Our team is excited to guide you through the entire process, from design and planning to construction and aftercare. Let us welcome you into our family of satisfied customers who have experienced the joy of outdoor living at its finest.